
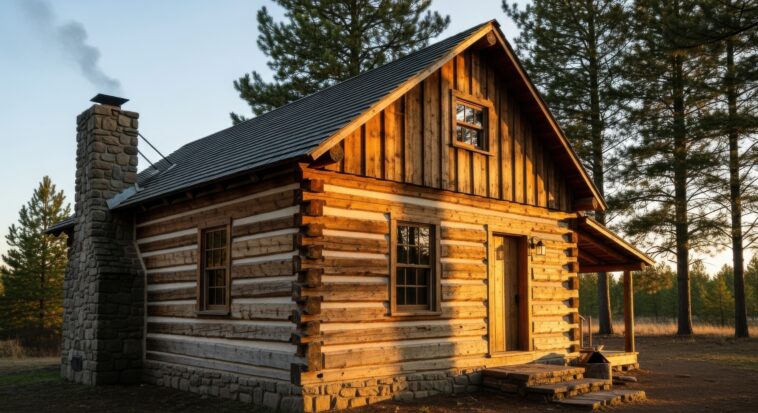
There is a specific kind of romance to owning a log home. You aren’t just living in a house; you’re living in a piece of craftsmanship that feels alive. But as every log home owner knows, that “living” structure comes with a to-do list that never quite ends. Logs settle, sun fades the finish, and the elements are constantly trying to turn your dream cabin back into the forest floor.
When the wood starts to look gray or the drafts start sneaking in, it’s easy to feel overwhelmed. You might assume you need a full professional crew to bring it back to life. While some major structural repairs definitely require experts, there is a surprising amount of log cabin restoration you can handle yourself with a free weekend and a little elbow grease.
If your cabin is looking a little tired, don’t panic. You don’t need to rebuild it; you just need to give it some targeted attention. Here are the most effective DIY projects that will protect your investment and restore that golden glow, ranging from critical maintenance to simple aesthetic upgrades.
1. The Deep Clean Without the Damage
Restoration starts with removing the layers of dirt, pollen, and gray UV-damaged wood fibers that accumulate over time. Many homeowners grab a high-powered pressure washer and blast away, but this is a rookie mistake. High pressure can fuzz the wood grain, forcing water deep into the logs, where it creates rot later.
The DIY Fix: Opt for a soft wash approach. Use a specialized log wash solution (or a gentle mix of TSP and water) and a soft-bristle brush on a long pole. Apply the cleaner, let it sit for 15 minutes to break down the grime, and then rinse with a standard garden hose. If you must use a pressure washer, keep it on a low setting (under 500-800 PSI) and stand at least two feet back. You are washing the car, not stripping paint.
2. The Tap Test for Rot
Before you apply any new finish, you need to know what’s happening under the surface. Rot is the silent killer of log homes, often hiding behind what looks like solid wood.
The DIY Fix: Take a rubber mallet or the handle of a screwdriver and walk the perimeter of your house. Tap on the logs, specifically focusing on the bottom courses near the ground and the corners where water splashes back from the roof.
- Solid thud: Good wood.
- Hollow thud: Potential trouble.
If you find a soft spot, try the pick test with an ice pick or screwdriver. If it sinks in more than half an inch with little resistance, you have rot. While replacing a whole log is a pro job, you can easily treat small areas yourself using borate rods or liquid epoxy hardeners that soak into the wood and petrify it, stopping the rot in its tracks.
3. Chinking and Caulking
Over time, logs shrink and settle. The chinking (the thick mortar-like stuff between logs) or caulk can crack or pull away, creating a highway for ants, cold air, and moisture.
The DIY Fix: You don’t need to redo the whole house. Walk around with a tube of high-quality, textured log home sealant (don’t use standard silicone; it won’t stretch). Look for upward-facing checks—cracks in the logs that face the sky. These act like cups that catch rain. Fill these cracks to keep water out. For chinking gaps, if the old material is pulling away, clip the loose sections out. Insert a foam backer rod into the gap, and apply a fresh bead of chinking over it. Smooth it out with a specialized foam brush or a simple spoon dipped in water. It’s remarkably satisfying work that instantly improves your energy bills.
4. The Deck Refresh
Nothing drags down the curb appeal of a log home faster than a gray, splintery deck. Since the deck is often the transition point between the landscape and the cabin, restoring it makes the whole house look newer.
The DIY Fix: Skip the paint—it peels and traps moisture. Instead, rent a floor sander for the main boards and use a hand sander for the railings. Once you’re down to raw wood, apply a penetrating oil stain that matches or complements your log color.
Pro Tip: If your logs are a dark honey color, try a slightly contrasting tone for the deck floor to add visual depth.
5. Modernize the Hardware
Sometimes restoration is aesthetic. Log cabins can veer into “kitsch” territory if the hardware is dated (think rusty wagon wheels or cheap 80s brass). Updating these small details can modernize the home without losing its rustic soul.
The DIY Fix: Swap out your exterior light fixtures for oversized, dark bronze or matte black lanterns. Modern farmhouse style lighting works beautifully with log structures because it shares the same industrial-rustic DNA. Also, look at your house numbers and door handle. Installing a chunky, matte black handle set on the front door gives the entrance a heavy, quality feel that matches the weight of the logs.
6. The Green Zone Barrier
Restoration isn’t just about the wood; it’s about the environment touching the wood. Overgrown landscaping is a log home’s enemy. Shrubs touching the logs trap moisture and invite termites.
The DIY Fix: Create a no-grow zone. Prune all bushes and tree limbs back at least three feet from your walls. Then, install a perimeter of crushed rock or gravel extending 18 inches out from the foundation. This does two things:
- It keeps wet soil and grass off your bottom logs.
- It reduces “splash back” from rain, keeping your lower logs drier and cleaner.
7. Paint the Front Door
While you should never paint your logs (they need to breathe!), the front door is fair game. A pop of color here can redefine the character of the cabin.
The DIY Fix: If your cabin is a traditional brown stain, a deep forest green, slate blue, or even a bold barn red door can look stunning. It creates a focal point that breaks up the wall of wood’s visual effect.
A Note on What Not To Do
As you dive into these projects, avoid the most common DIY trap: sealing wet wood. Never wash your logs and stain them the next day. Log wood is like a sponge. If you seal moisture inside with a fresh coat of stain, that water will try to escape, causing your beautiful new finish to blister and peel within months. Always allow 3-4 dry days after washing before you open a can of stain.
Restoring your log cabin doesn’t have to mean a massive bank loan and a construction crew. By tackling these manageable projects one weekend at a time, you not only save money but you deepen your connection to the home. You’ll know every corner, every check, and every log—and you’ll have the satisfaction of knowing you’re the one keeping it standing strong.